
I want to share one of my tried and true recipes… sourdough buns. When I am short on time and on brain power, I make a big batch of these to keep us afloat until the chaos subsides or the brain space increases.
In this post...
- 1 A sourdough bun recipe you can count on.
- 2 Baking with sourdough fits your schedule, whatever that is.
- 3 Equipment Needed
- 4 The Process
- 4.1 Step 1 – Weigh and Grind Your Grain
- 4.2 Step 2 – Weigh out the rest of your ingredients directly into your mixing bowl
- 4.3 Step 3 – Mix it all together
- 4.4 Step 3 – Give it a rest
- 4.5 Step 4 – Knead
- 4.6 Step 5 – Proof your dough
- 4.7 Step 6 – Shape your dough
- 4.8 Step 7 – Cover and let it rise
- 4.9 Step 8 – Bake at 375 for 20-25 minutes
- 5 Dressing up your sourdough buns
- 6 How can I get the sourdough bun recipe?
A sourdough bun recipe you can count on.
I think it’s super handy to have a reliable recipe to fall back on when life gets crazy. Like when your children are sick for days. And you yourself are feeling unwell, but haven’t succumbed yet. You know… those kind of days.
For me, one of those recipes is my whole wheat sourdough honey buns. I can make this recipe into rolls, buns, or sandwich bread. My kids will eat these at any time, even when they’re super sick.
We currently have a plague of sorts going through the house. Because of all the extra care needed, the baked goods are disappearing fast – even my stock of freezer bread is running a bit low. So I just whipped up an 8x batch to keep us fed for a few days.
Baking with sourdough fits your schedule, whatever that is.
One of the ways sourdough really shines is how it fits into an unpredictable schedule. I know it seems counter intuitive, but with modern refrigeration you can make baking with sourdough fit your schedule, even if it changes suddenly.
I typically mix up these sourdough buns whenever it’s convenient. Since I store my active starter in the fridge, I can whip this up at a moment’s notice.
I will generally let this recipe rise in the fridge, but I try to allow it to proof on the counter for a bit first to give it a head start. Then I can pull it out when I am ready to shape the rolls.
This recipe also works equally well if you let it proof on the counter. What I do just depends on my schedule!

After shaping, if I don’t have time to let them proof and bake (usually just a few hours), I put then back in the fridge, covered with a damp towel and allow the rolls to proof in there. I can also bake them straight from the fridge, they may just require a couple more minutes in the oven.
See what I am saying? It’s Super. Flexible.
Equipment Needed
This post contains affiliate links. View our privacy policy for more information.
- Stand Mixer
- Kitchen Scale
- Sheet Pan
- Dough Scraper or Spatula

The Process
Let me walk you through the processes.
Step 1 – Weigh and Grind Your Grain
Making sourdough buns starts with weighing my grain into a bowl. I turn on my KomoMill before adding anything so I can adjust the stones. What this means is I tighten the stones until I hear the tick tick tick sound of the stones touching, then I click back towards “grob” a notch or two. Now we’re ready to grind! Dump those grains in the hopper and let it do it’s thing.
Grinding straight into your mixing bowl is the way to go if you can do it. This makes one less dish to clean up!
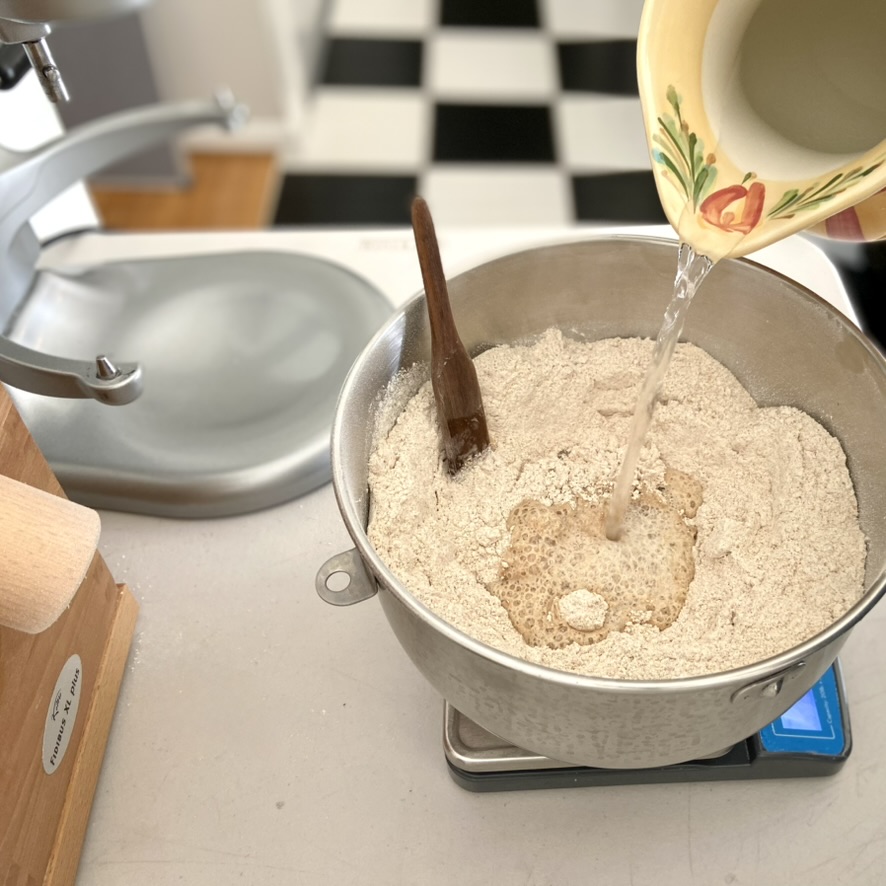
Step 2 – Weigh out the rest of your ingredients directly into your mixing bowl
Placing my bowl on my kitchen scale (which is actually a shipping scale), I weigh the rest of my ingredients directly into the bowl. This is another reason I love making recipes by weight instead of volume – I go through far fewer dishes! No measuring cups or spoons required.
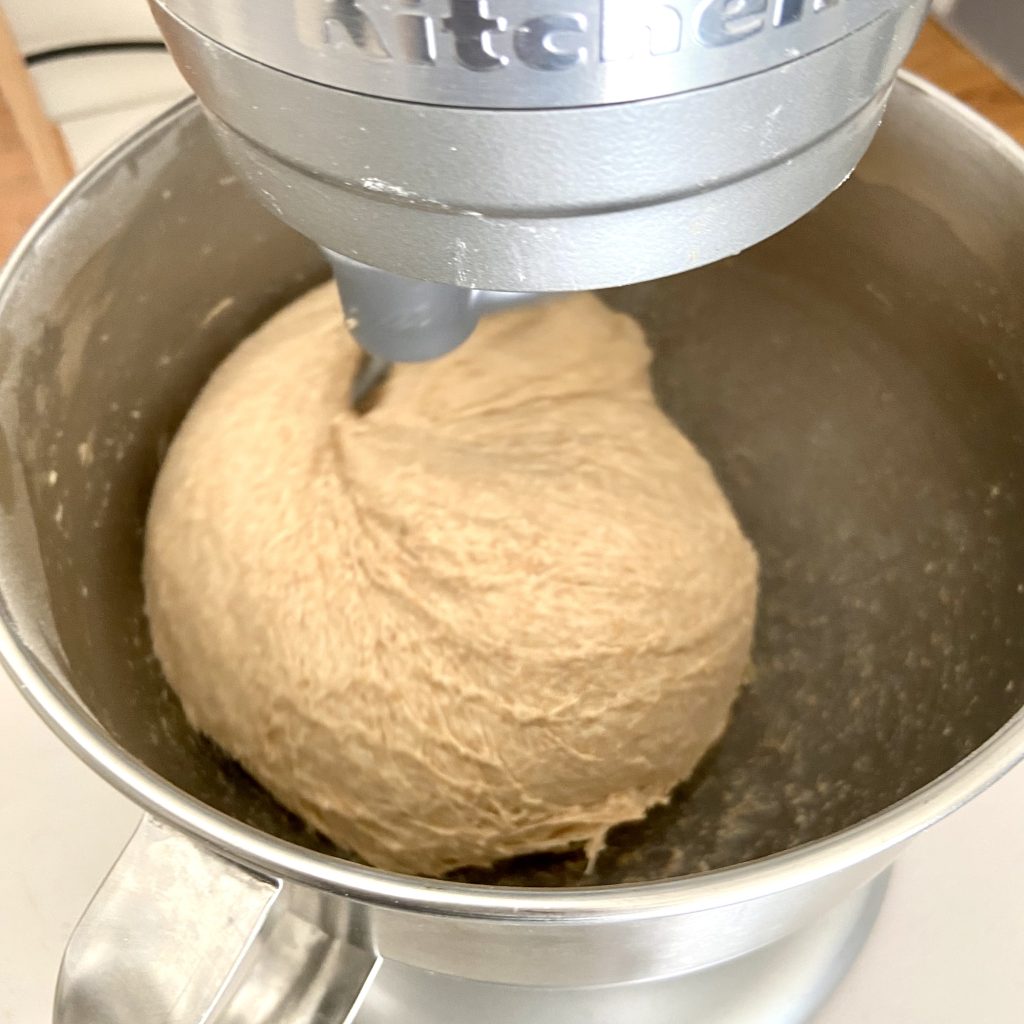
Step 3 – Mix it all together
Using a flat mixing paddle (I love KitchenAid’s flex edge paddle), I start my mixer on its lowest setting (1/2 on a KA) and let it run until most the ingredients are mixed together. I then increase the speed to 1 for about 30-60 seconds and then run it on speed 2 for another 30-60 second.
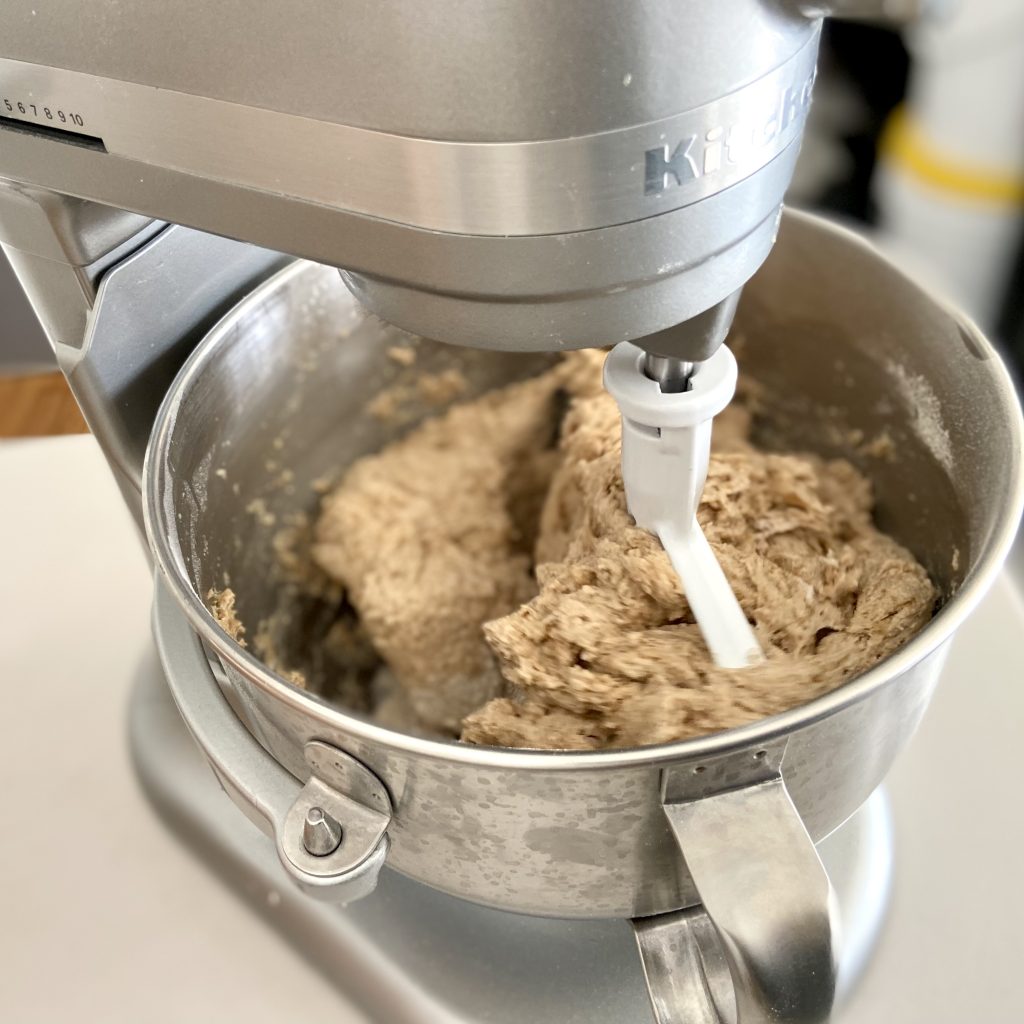
You’re looking for your dough to form a bit of a ball on the flat paddle, then it will begin sticking to the sides and look like you need to scrape it down with a spatula or dough scraper. This is all the mixing required.
Remove the mixing paddle from the bowl, taking care to scrape as much dough off as possible. Use a dough scraper to scrape down the sides of your bowl and place a dinner plate on top of your bowl to cover it while it rests – no plastic wrap required.
Step 3 – Give it a rest
Allow your dough to rest for 30-60 minutes. This allows the flour time to absorb as much liquid as possible and it also allows the gluten time to develop. No need to mix endlessly trying to reach what bakers call windowpane. Windowpane is when you can stretch your dough out thin and see a bit of light coming through. Given enough time and hydration, your dough will reach this without having to work your dough endlessly.
Step 4 – Knead
Attaching a dough hook to my KA mixer, I knead my dough for 4-5 minutes on speed 2 until the dough looks nice a smooth. If your dough does not come together quickly into a ball, you may need to add a 1/4 cup more flour. It’s ok if it sticks to the bottom a little, especially at first.
If you do need to add flour, once you mix the flour in, let it rest for 15 minutes and attempt to knead it again. It should come together into a ball. If not, add more flour. Repeat this process as necessary. AND MAKE SURE TO TAKE NOTES! The reality is that every batch of grain is a little different. Some will absorb more water than others. Personally, I rarely have to add more flour, but it does occasionally happen.

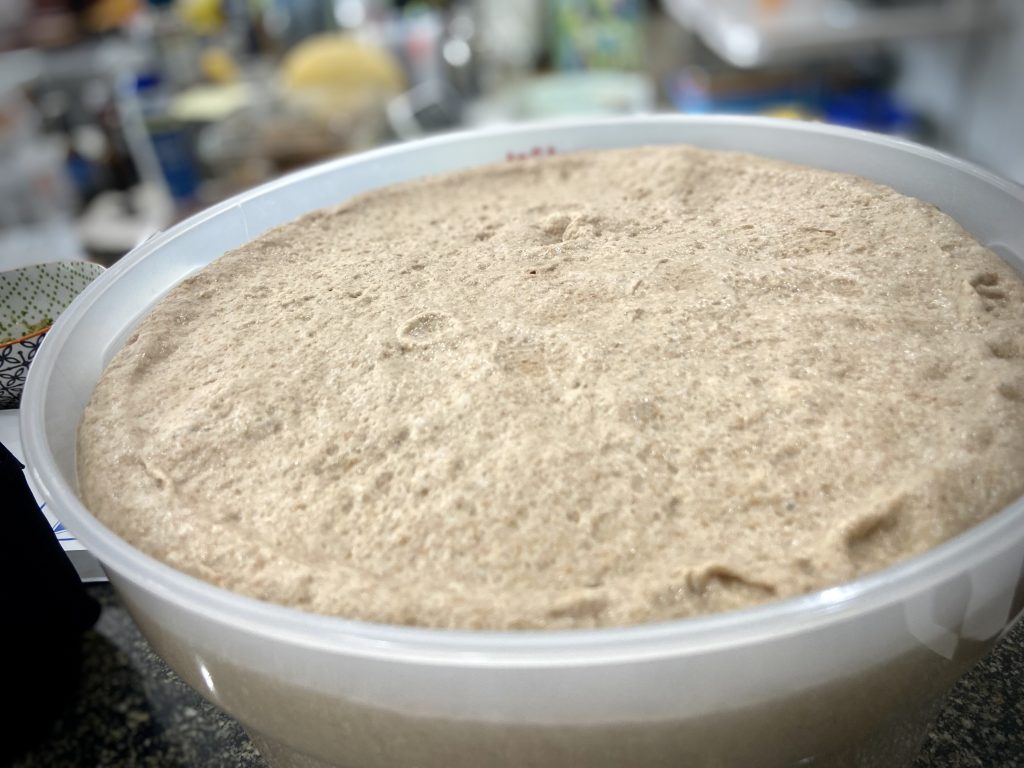
Step 5 – Proof your dough
This one step that is quite flexible. If you’ve read the whole post, I talk about how to make this step work in your favor if you need to change your schedule or when you bake. Your dough needs to double and that’s the simple. Depending on my availability for the day, I will proof this recipe on the counter, the fridge, or some combination of the two.
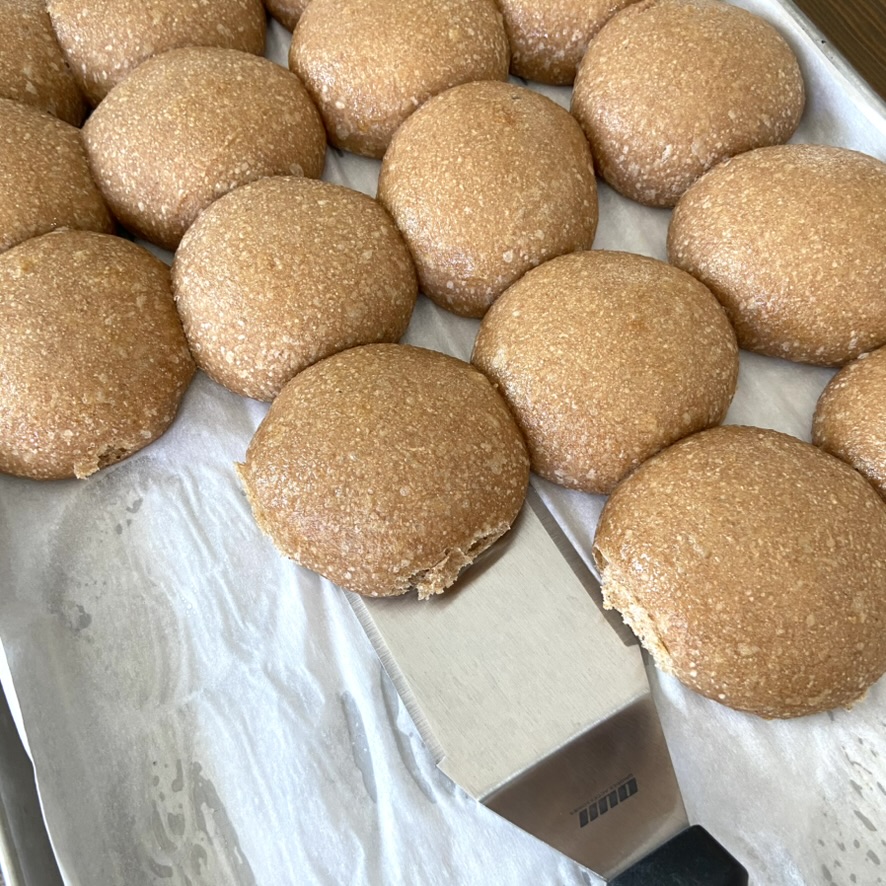
Step 6 – Shape your dough
Lining a sheet pan with parchment paper, I divide my dough into whatever size portions I need and shape. I am going to cover making 3oz sourdough buns because that is what we make most often, but you can use the following measurements as the guide for your own needs!
- 1.5 ounces for small dinner rolls
- 2oz for medium dinner rolls or small slider buns
- 3oz for large dinner rolls, medium slider buns, or small hamburger buns
- 4oz for sandwich buns or standard hamburger buns
- 16-17 ounces for a small loaf of bread
Once my dough is divided on the counter, I get a small bowl of water to dip my fingers in and start shaping. First I press the piece of dough flat and then start pulling the edges slightly out and then towards the center to begin building tension in the roll and encourage good oven spring.


Once all the edges are pulled towards the center I pinch everything towards the center in a dumpling sort of shape and place that side down on the pan, smooth side up.

I am usually working with a half size sheet pan and can fit about twenty-four 3oz buns on one sheet pan.
Step 7 – Cover and let it rise
Cover your rolls with a damp kitchen towel and allow them to rise until puffy. These rolls spread a bit more out than up while proofing, but don’t worry! They spring up nicely in the oven. You are looking for them to feel a bit puffy and a bit spread out, then they are ready to bake!

Step 8 – Bake at 375 for 20-25 minutes
After pre-heating the oven, I bake these until they are lightly browned on the top, although they don’t necessarily need to be browned. They just need to measure 200 degrees in the center as measured with an instant read thermometer.
Once they are done, brush their tops with butter and cool on wire racks.

Dressing up your sourdough buns
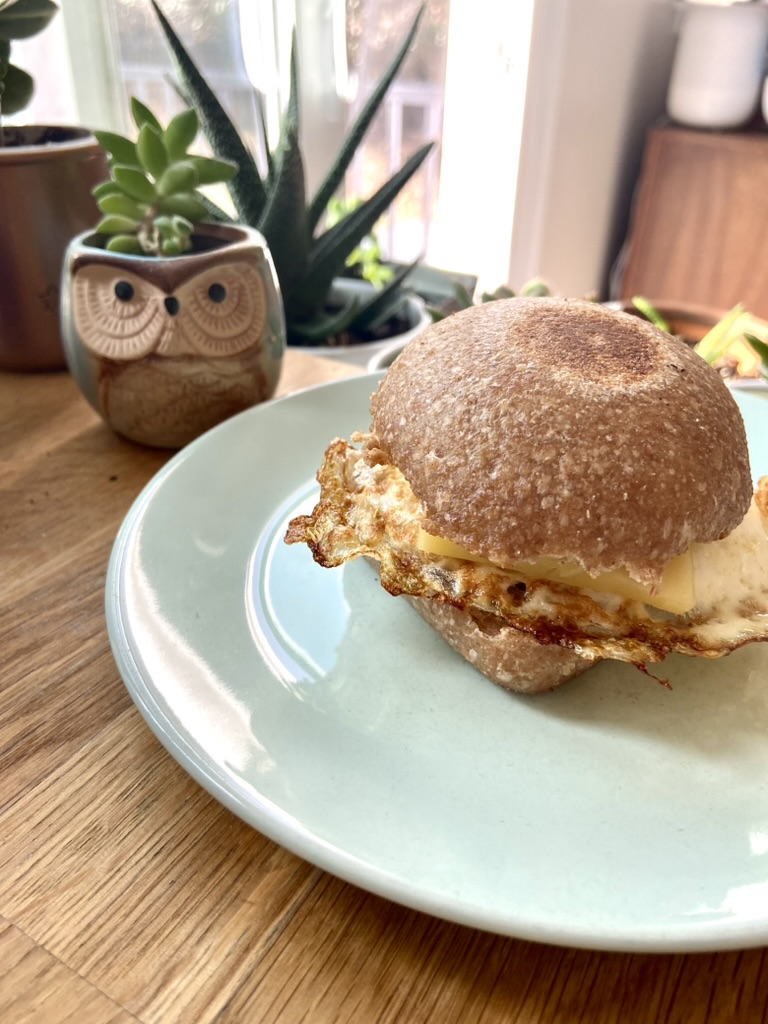
Our favorite way to use these buns is simply to warm them slightly in the toaster and eat with butter. They are excellent this way! Another favorite is with peanut butter and jelly, or my favorite, honey instead of jelly. We also love to toast these on a pan and serve with an egg and cheese or ham to make a delicious breakfast sandwich. The also make an excellent carrier for sloppy joes and BBQ sandwiches. The possibilities are endless! I hope you’re seeing why I love this recipe.
How can I get the sourdough bun recipe?
To get this particular recipe, click here or use the “My Go To Recipe” link at the top of the page. Let me know how you end up using these sourdough buns to best serve your family! Pictures are even better.
Hi! I’m Christina. I’m mama to 13 and grandma to two. With a toddler still underfoot, I’m in the thick of life just like you! My two top passions at the moment are baking with fresh milled flour and giving my children a positive homeschooling experience. Sprinkle in marriage, coffee, a small homestead, and life is overflowing! Learn more…
Leave a Reply